CI/CD pipeline on AWS (Part - 4) CodePipeline
#90 Days of DevOps Challenge - Day 53


What is CodePipeline?
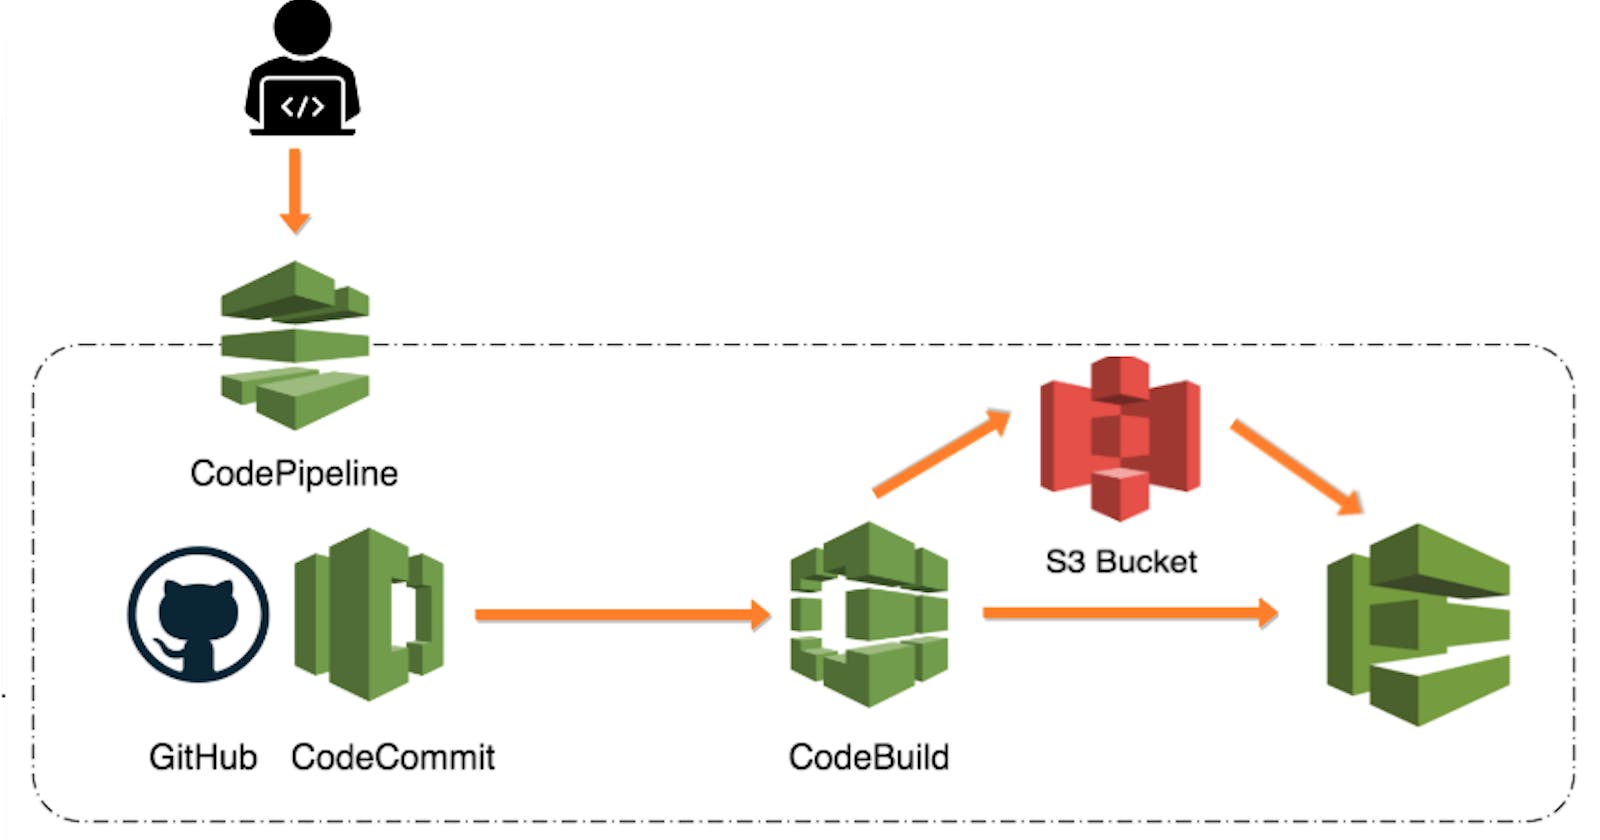
AWS CodePipeline is a fully managed continuous delivery service provided by Amazon Web Services (AWS). It helps automate the release pipelines for building, testing, and deploying software applications. CodePipeline enables you to create, model, and visualize the entire software release process, from source code to production deployment.
key aspects and features of AWS CodePipeline:-
Continuous Delivery Workflow:- CodePipeline allows you to define a series of stages and actions to represent your software delivery workflow. Each stage represents a logical step in the pipeline, such as source code management, build, test, and deployment. Within each stage, you can configure various actions, such as running tests or deploying to different environments.
Source Code Integration:- CodePipeline integrates with various source code repositories, including AWS CodeCommit, GitHub, and Bitbucket. It can automatically detect changes in the source code repository and trigger the pipeline execution, ensuring that your pipeline stays up to date with the latest changes.
Flexible Actions:- CodePipeline supports a wide range of actions to perform different tasks within each stage. These actions include building the application code using AWS CodeBuild, deploying to Amazon EC2 instances or AWS Lambda functions using AWS CodeDeploy, running tests with AWS CodeBuild or third-party testing tools, and executing custom scripts or AWS CLI commands.
Visual Pipeline Editor:- CodePipeline provides a visual editor that allows you to graphically design and model your pipeline. You can drag and drop stages and actions, define dependencies between them, and visualize the flow of the entire software release process. This visual representation helps in understanding and managing the pipeline more effectively.
Integration with AWS Services:- CodePipeline seamlessly integrates with other AWS services, enabling you to leverage their capabilities within your deployment pipeline. It works well with services like AWS CodeBuild, AWS CodeDeploy, AWS CloudFormation, AWS Elastic Beanstalk, and more. This integration facilitates building comprehensive and automated release pipelines using a combination of AWS services.
Monitoring and Notifications:- CodePipeline provides real-time visibility into the progress of your pipeline. You can monitor each stage and action, view logs and detailed execution information, and track the overall status of the pipeline. CodePipeline also supports notifications through Amazon SNS, enabling you to receive alerts and notifications about pipeline events and status changes.
Customizable and Extensible:- CodePipeline is highly customizable and extensible. You can define custom stages, actions, and plugins to integrate with third-party tools or perform specialized tasks. This flexibility allows you to tailor the pipeline to meet your specific deployment requirements.
By utilizing AWS CodePipeline, you can automate and streamline your software release process, ensuring faster and more reliable deployments. It provides a centralized and visual approach to managing the entire release pipeline and integrates seamlessly with other AWS services, allowing for a comprehensive DevOps solution.
Task-01 :
Create a Deployment group of Ec2 Instance.
Create a CodePipeline that gets the code from CodeCommit, Builds the code using CodeBuild and deploys it to a Deployment Group.
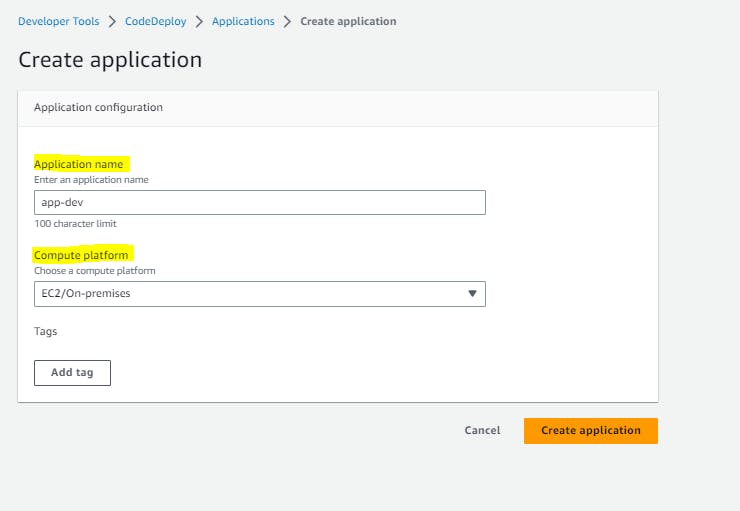
Step 1:- We need to create CodeDeploy application

We need to give name and select Compute platfrom and click on Create application

Create a new service role for enabling communication between code deploy and other AWS services.
Go to IAM service and create 'code-deploy-service-role' with permissions.
"AmazoneEC2FullAccess", "AmazoneS3FullAccess", "AWSCodeDeployRole", "AmazoneEC2RoleforAWSCodeDeploy", "AWSCodeDeployFullAccess", "AmazonEC2RoleforAWSCodeDeployLimited".


Need to change trust relationship
{
    "Version": "2012-10-17",
    "Statement": [
        {
            "Effect": "Allow",
            "Principal": {
                "Service": "codedeploy.amazonaws.com"
            },
            "Action": "sts:AssumeRole"
        }
    ]
}
Step 2:- Now we need to create a EC2 Instance

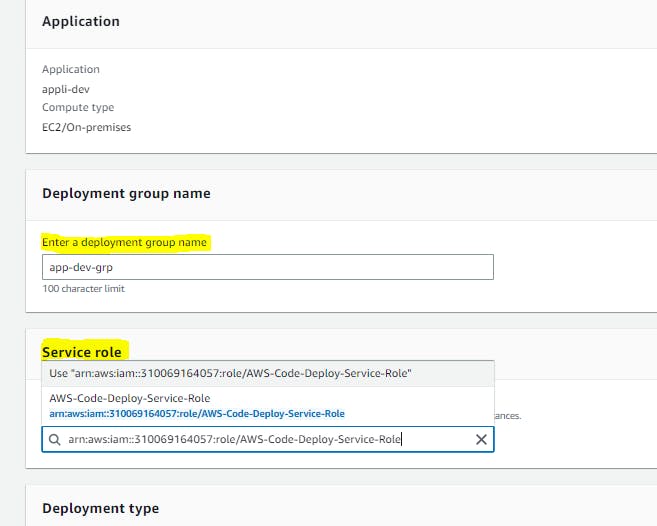
Step 3:- Need to create a deployment group

need to select Deployment group name and service role
select EC2 instance name (key and value)

Click on 'Create deployment group'
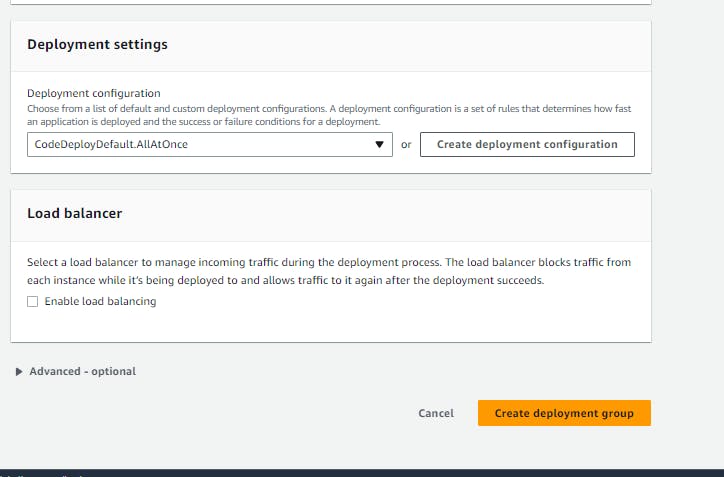
Deployment group is created

Step 4:- We need to Setup a CodeDeploy agent to deploy code on EC2
You need to install the CodeDeploy agent on your Ubuntu EC2 instance. The CodeDeploy agent is a software package that runs on your instance and interacts with CodeDeploy to deploy your application.
You can install the CodeDeploy agent by running the following script on your EC2 instance:
#!/bin/bash
# This installs the CodeDeploy agent and its prerequisites on Ubuntu 22.04.
sudo apt-get update
sudo apt-get install ruby-full ruby-webrick wget -y
cd /tmp
wget https://aws-codedeploy-us-east-1.s3.us-east-1.amazonaws.com/releases/codedeploy-agent_1.3.2-1902_all.deb
mkdir codedeploy-agent_1.3.2-1902_ubuntu22
dpkg-deb -R codedeploy-agent_1.3.2-1902_all.deb codedeploy-agent_1.3.2-1902_ubuntu22
sed 's/Depends:.*/Depends:ruby3.0/' -i ./codedeploy-agent_1.3.2-1902_ubuntu22/DEBIAN/control
dpkg-deb -b codedeploy-agent_1.3.2-1902_ubuntu22/
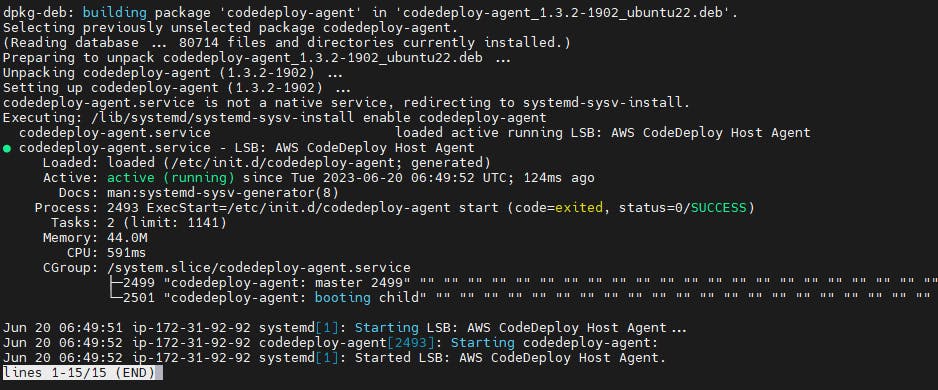
sudo dpkg -i codedeploy-agent_1.3.2-1902_ubuntu22.deb
systemctl list-units --type=service | grep codedeploy
sudo service codedeploy-agent status

After running the commands we can verify the status that Code Agent is running.
Step 5:- Now need to create a CodePipeline that gets the code from CodeCommit, Builds the code using CodeBuild and deploys it to a Deployment Group.
Need to go to the CodePipeline console. Click "Create pipeline."

provide the pieline name and select service role and click on next

Now in the source code management since we are using codecommit so we need to provide same and repo name , branch name

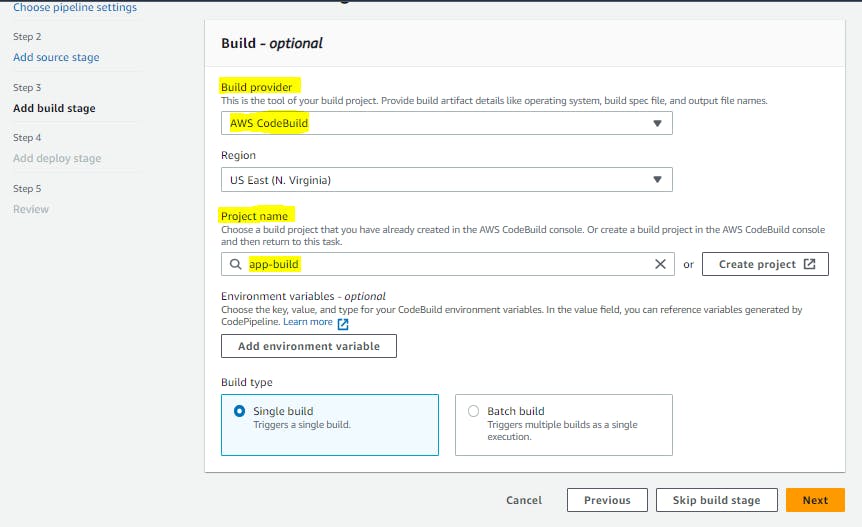
Under "Build provider," choose "AWS CodeBuild."
Select the build project name and then click on "Next."
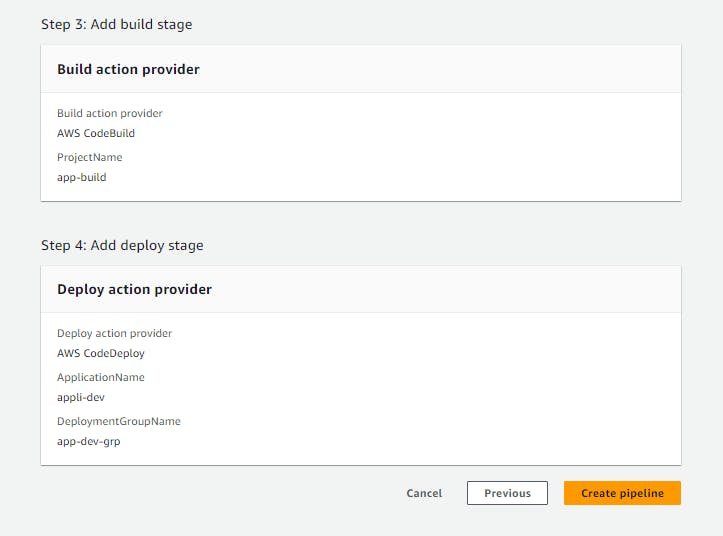
Under "Deploy provider," choose "AWS CodeDeploy."
Select the deployment group you created earlier and click on "Next."

Now we need to review all the pipelines and click on Create pipeline


Now all the stages will automatically trigger one by one


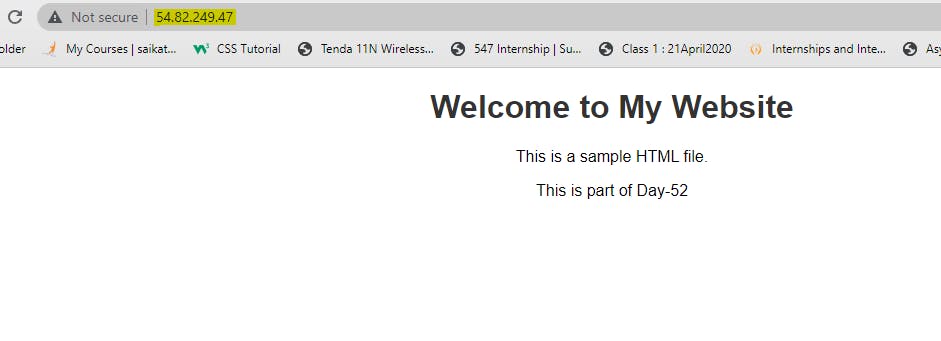
Now if we search through EC2 instance public ip address we acn see the expected results
Thank you for reading!! I hope you find this article helpful!!
if any queries or corrections to be done to this blog please let me know.
Happy Learning!!
Saikat Mukherjee