Terraform configuration file ,state files, provisioner and lifecycle management
TerraWeek Day 3

Welcome here. This is Saikat currently working as a Software Engineer with a total experience of 2+ in the IT industry. Am passionate about learning DevOps and wanted to deep dive into tools like Kubernetes, EKS, Docker , Ansible , Terraform etc.
Create a Terraform configuration file to define a resource of AWS EC2 instance
# Specify the provider (AWS in this case)
provider "aws" {
  region = "us-east-1"
}
#Define the EC2 instance resource
resource "aws_instance" "example" {
  ami           = "ami-053b0d53c279acc90"
  instance_type = "t2.micro"

  tags = {
    Name = "my-ec2-instance"
  }
}
Step 1:- terraform init -This command will scan your tf files in that folder and install all the required automation things

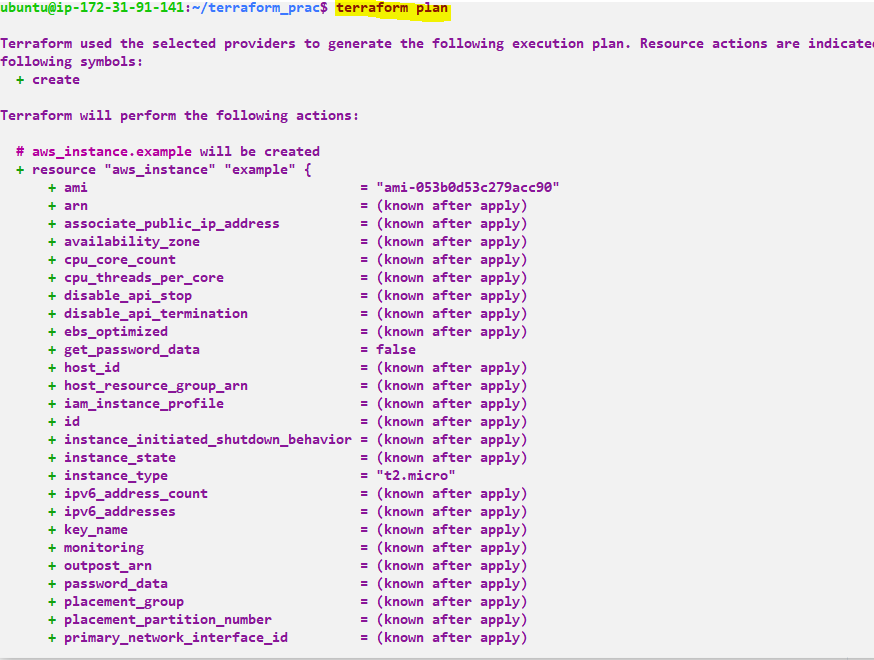
Step 2:- terraform plan -This command will create an execution plan for terraforming, the things that will be installed, the names, and the properties added.
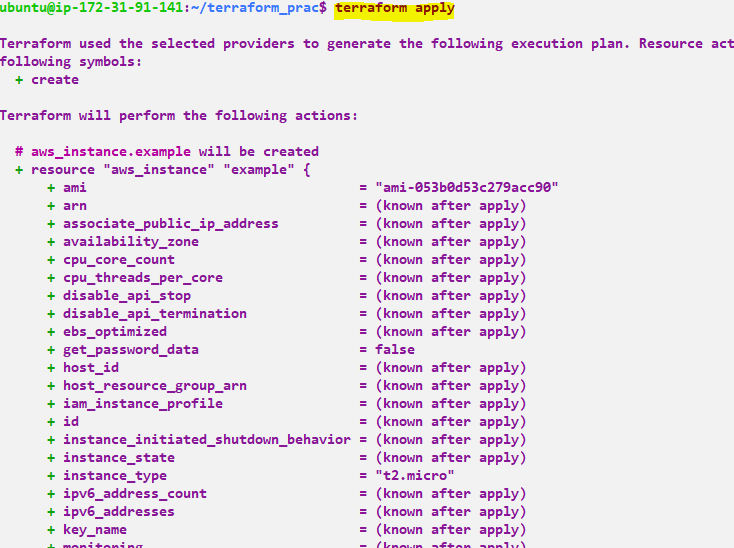
Step 3:- terraform apply -The actual execution and automation happen in this command.
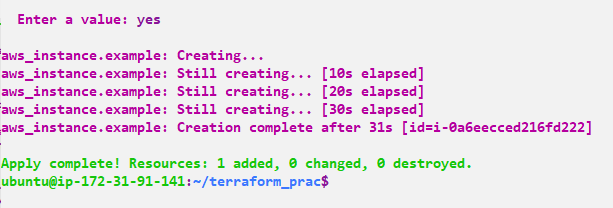
Now we can see EC2 instance is up and running

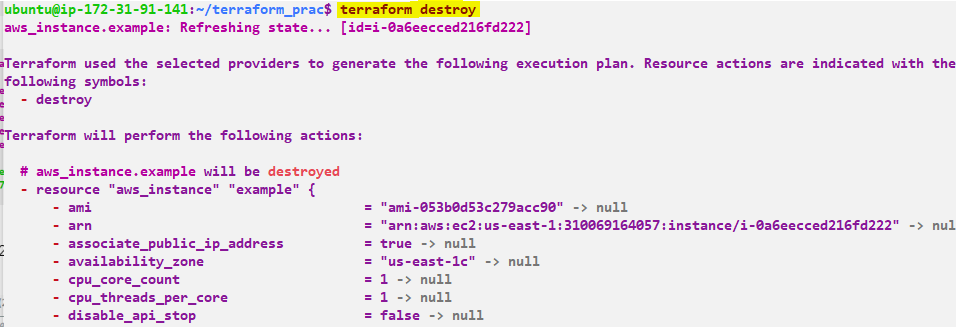
Step 4:- terraform destroy - This command used to destroy all the resources which is created by Terraform
Check state files before running plan and apply commands & Use validate command to validate your tf file for errors and provide the Output generated by each commands.
Before running plan and apply we need to make sure everything is correct or not so in that scenario, we need to validate the file and we can run the below command so If the state files are not up-to-date, Terraform may make incorrect changes to your infrastructure.
$ terraform validate
Success! The configuration is valid.

If we need to check the state file then we need to run the below command
$ terraform state list
aws_instance.example_instance

$ terraform state show aws_instance.example_instance
Add a provisioner to the configuration file to configure the resource after it is created and use Terraform commands to apply for changes and destroy to remove resources.
Provisioners are used to execute scripts on a local or remote machine as part of resource creation or destruction. Provisioners can be used to bootstrap a resource, cleanup before destroy, run configuration management, etc.Provisioners are added directly to any resource
Types of Provisioners:-
There are two types of provisioners:
Generic Provisioners: These are generally vendor independent and can be used with any cloud vendor. Eg: file, local-exec, and remote-exec
Vendor Provisioners: It can only be used only with its vendor. Eg: the chef provisioner can only be used with the chef for automating and provisioning the server configuration, habitat, puppet, and salt-masterless
# Specify the provider (AWS in this case)
provider "aws" {
  region = "us-east-1"
}
#Define the EC2 instance resource
resource "aws_instance" "example" {
  ami           = "ami-053b0d53c279acc90"
  instance_type = "t2.micro"

  tags = {
    Name = "my-ec2-instance"
  }
}

# Add Provisioner
provisioner "remote-exec" {
    inline = ["echo 'This file is created for provisioner' > /home/ubuntu/file.txt"]
  }
Step 1:- terraform init -This command will scan your tf files in that folder and install all the required automation things
Step 2:- terraform plan -This command will create an execution plan for terraforming, the things that will be installed, the names, and the properties added.
Step 3:- terraform apply -The actual execution and automation happen in this command.
Step 4:- terraform destroy - This command used to destroy all the resources which is created by Terraform
Add lifecycle management configurations to the configuration file to control the creation, modification, and deletion of the resource and use Terraform commands to apply the changes.
lifecycle is a nested block that can appear within a resource block. The lifecycle block and its contents are meta-arguments, available for all resource blocks regardless of type. The arguments available within a lifecycle block are create_before_destroy , prevent_destroy , ignore_changes , and replace_triggered_by
create_before_destroy- By default, when Terraform must change a resource argument that cannot be updated in-place due to remote API limitations, Terraform will instead destroy the existing object and then create a new replacement object with the new configured arguments.Destroy provisioners of this resource do not run ifcreate_before_destroyis set totrue.prevent_destroy-This meta-argument, when set totrue, will cause Terraform to reject with an error any plan that would destroy the infrastructure object associated with the resource, as long as the argument remains present in the configuration.This can be useful to protect critical resources from accidental deletion.ignore_changes-Allows you to specify attributes that Terraform should ignore during updates. In this example, we've specifiedtagsas an ignored attribute, meaning changes to thetagsblock will not trigger a recreation of the resource.replace_triggered_by-If the reference is to a resource with multiple instances, a plan to update or replace any instance will trigger replacement.If the reference is to a single resource instance, a plan to update or replace that instance will trigger replacement.
If the reference is to a single attribute of a resource instance, any change to the attribute value will trigger replacement.
You can only reference managed resources in
replace_triggered_byexpressions. This lets you modify these expressions without forcing replacement.
resource "aws_instance" "example_instance" {
  # Resource attributes...

  lifecycle {
    create_before_destroy = true
    prevent_destroy       = true
    ignore_changes        = [tags]
  }
}
Devops#devops,#TerraWeek Day 1
Thank you for reading!! I hope you find this article helpful!!
if any queries or corrections to be done to this blog please let me know.
Happy Learning!!
Saikat Mukherjee


